Developer Setup
Before you get started, there are a few dependencies that you will need to make sure you have installed before contributing toToyNet.
Getting Started with ToyNet Frontend Development
toynet-react is ToyNet's frontend service and is written in React using Typescript. To get started with local development make sure that you have the correct dependencies installed as listed above.
If you are not a not a member on Project Reclass' GitHub organization, you will first need to fork the toynet-react repository.
To fork the repository, you will need to go to the repo and click the "fork" button in the top right. You will use this new repository to make pull requests against the main Project Reclass repository.
Starting ToyNet for Development
Install all of the dependencies using
npm iUpdate the
proxyfield of thepackage.jsonto behttps://toynet.projectreclass.orgIf using something like gitpod set
export DANGEROUSLY_DISABLE_HOST_CHECK=truebefore running npm startStart the development server with
npm run start
This will start up the development server. This server includes hot reloading so any changes made to the application will cause a re-build and will refresh your browser.
Additional Scripts
There are several npm scripts that can be used in your development that can be ran with npm run [script]
Getting Started with ToyNet Backend Development
toynet-flask is ToyNet's backend service and is written in Python. To get started with local development make sure that you have the correct dependencies installed as listed above.
venv
Create a project folder and a venv folder within:
Before you work on your project, activate the corresponding environment:
Install Python Requirements (add new requirements via pip3 freeze > requirements.txt.)
You can exit this virtual environment anytime via running:
More information here
From there, make sure to build the toynet docker image from toynet_mininet and tag it with the same tag you use in the below environment variable for TOYNET_IMAGE_TAG. First you will need to download mininet. You can do this by initializing the submodule.
You will then need to build the image. The default way, which will work with the Makefile here, is to go into the toynet_mininet submodule and run:
if you want a test image. If you want a production image then run:
also in the toynet_mininet directory.
Note: See the toynet_mininet README for more information on building and developing toynet_mininet.
Run the service
Make sure that, if you are testing anything related to sessions or network emulation, that you build the appropriate image (dev or prod) in toynet-mininet.
The following tutorial applies to Linux / MacOS development environments. Visit Windows documentation here.
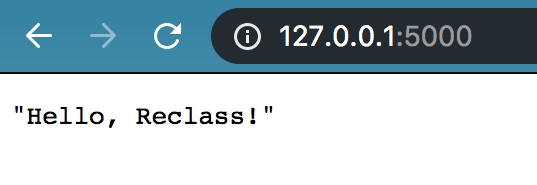
Go to: http://127.0.0.1:5000/
Makefile
The Makefile facilitates common workflows, run make help for detailed instructions. You can use it to run everything in Docker containers, as opposed to running Flask locally as described above.
Swagger API Documentation
Visit swagger documentation to generate living documentation about available API endpoints alongside your flask instance.
Test the Service
Visit testing documentation to learn how to unit test, run manual tests in development, and query SQLite files.
Last updated
